Dodge These Real Estate Photo Mistakes
“A picture is worth a thousand words.” This statement rings especially true for real estate photographs. These pictures are the first things a potential home buyer sees when you post a listing on a real estate website – and aside from the property details provided, these images will do most of the talking.
Unfortunately, not all of us have a professional photographer’s eye or have the budget to hire one. If you’re going to take a listing’s pictures on your own, here are real estate photo mistakes you should avoid to create picture-perfect moments.
-
Let there be light. Lighting can greatly impact how a photo will turn out. According to Brian Balduf of VHT, a real estate photographers’ network, real estate photography is all about lighting. Poorly lit rooms create unattractive, dark, and grainy pictures while rooms that are bathed in too much light will create an overexposed photo.
The trick is to keep the light balanced. You can use an external flash for dark areas and open or close windows to regulate the amount of natural light you’re letting in the room.
Pro tip: Do as the professionals do and benefit from the wonders of HDR imaging. This method allows you to layer multiple exposures of a photo to achieve the best lighting possible.
-
A wide-angle lens is your friend. Your average camera lens will not be able to capture the room’s whole depth and space. Using a wide-angle lens enables you to balance and scale the scene well, translating to a photo that presents a spacious yet balanced room. In photographing a room, it’s also useful to include three walls in the picture to add more depth and balance.
Pro tip: One of the most popular and important rules in photography is the “rule of thirds.” It’s simple. Break down the scene into thirds. Well-placed points of interests on intersections create balance, which will make for a prettier picture.
-
Keep it crisp and clear. Blurred pictures are a no-no; it equates to a lack of professionalism. Potential homebuyers might think your home listing’s photos were poorly taken. Using a tripod can remedy this situation, however, and using a steady camera in a well-lit room will produce a nice photo that will pique a potential home buyer’s interest.
-
Show and tell. Uploading a good number of photos will generate more interest among potential clients. If you have a beautiful home you want to sell, you might as well show it off for the whole world to see. Add pictures of room details such as wall accents and cabinetry to insert a little variety in your home listing’s photo album or slideshow.
-
Stage your home. Home-staging allows your potential home buyer to imagine what living in the home would be like. “Staging is an art form in merchandising,” says Audra Slinkey, the president of Home Staging Resource. “We are creating a space the buyer will fall in love with. When we do this, the demand for the product goes up and thus the price too.”
Pro tip: When photographing staged rooms, make sure to focus on the focal point of the room. Accents are just accents, and you’re not selling the furniture used in the shot, are you? Include photos of features that actually come with the house.
-
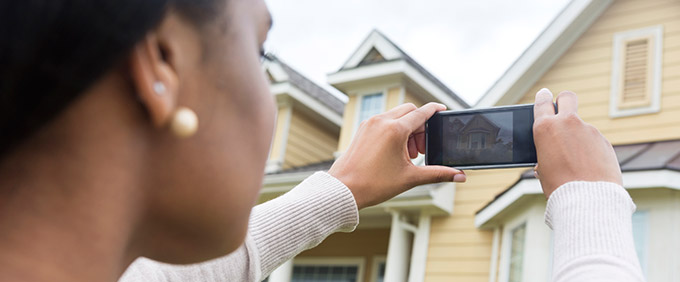
Utilize angles to show off your property. A photo of your home taken right from the front doesn’t exactly create the most flattering of pictures. Just think about what you do when you take pictures of yourself or other people, getting the angle right is extremely beneficial and produces a good photo. Looking for the right angle is also useful especially if you’re shooting a room with lots of reflective surfaces. A photographer’s reflection in a photo makes it look amateurish.
Pro tip: When photographing the exteriors of your home, take into consideration the weather and the time you’ll be shooting. Also take into account the direction the house faces. For rooms with mirrors and glass, kneeling on the floor or taking a photo from the side will lessen the possibility of you being included in the picture.
-
When all else fails, hire a professional. Sometimes, it’s best to admit defeat and leave the work to the professionals. It might cost you more, but the right pro is a worthy investment.
If you need tips or help on maintaining your property listings and adding all your beautiful photos, Agent Image has a virtual assistant service that can free up your time during the day to complete your plate of things to do. Call us at 1.800.979.5799 to find out our affordable options.