Frequently Asked Questions
Agent Image Help Center
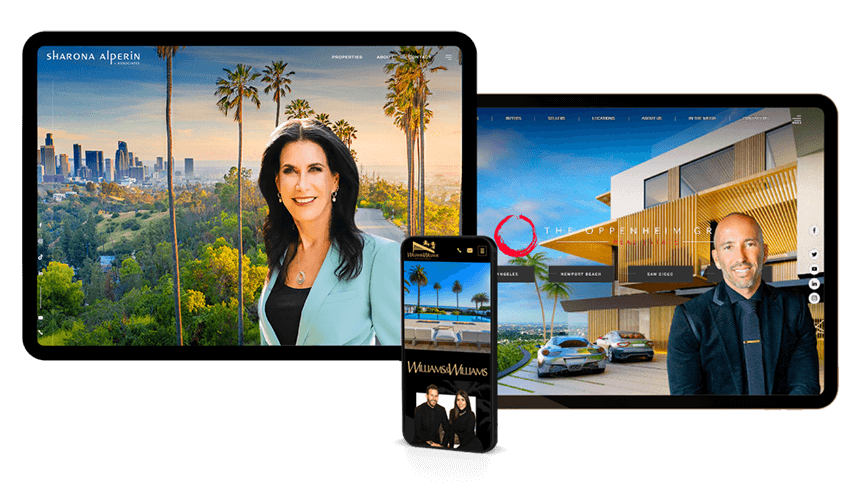
Websites
Top 5 FAQs
We have website packages designed for agents of all experience levels and brokerages of all sizes.
An Imagine Studio website is for real estate agents and brokerages that require a higher level of custom design.
Real estate agents, teams, and brokerages who are leading the market and want a trend-setting website.
Semi-Custom websites use the best of our template designs plus a home page layout and inner page customized for your brand.
A professional or team who wants the freedom to create a unique website styled to showcase their brand and generate leads.
Plug-and-play agent websites that are professionally designed to make a great first impression
Go-getter real estate agents who want a great-looking website to kickstart their online presence.
Our entry-level website that delivers on quality and style.
A single agent looking for a solid, easy-to-build website that gets the job done.
While our different packages offer different features, you can rest assured that your website will be mobile-friendly, search engine optimized, and built for lead generation.
What’s more, you’ll get these 30+ useful features as standard — regardless of what package you choose.
- Updatable featured properties
- Open house info
- Printable flyers
- Virtual tour compatibility
- Google Maps integration
- Commercial properties
- Property logos and PDF attachments
- Bio page
- Client testimonials
- Community profiles
- School info
- Financing options
- Buyer & seller resource pages
- Extra content pages
- General inquiry form
- Seller form
- Buyer form
- Relocation form
- Other basic forms
- WordPress plugins and widgets compatibility
- Lead management
- Customizable autoresponder
- Categorized leads
- Loan and amortization calculators
- URL redirects
- XML sitemap
- Custom robots file
- Manage and customize meta tags & SEO tools, Walkscore & Yelp Compatibility
How long website development takes largely depends on which package you choose and the amount of customization you need.
TEMPLATE-BASED PACKAGES
Agent Image X and Agent Pro websites require minimal customization. A typical
Agent Pro website can typically launch in 4 to 6 weeks, while a standard Agent Image
X website can launch in 2 to 4 weeks.
CUSTOM PACKAGES
We also offer packages that offer more customization, such as Semi-Custom, and
Imagine Studio. Of course, tailor-fitting your website requires additional time and
expertise, which is why custom packages take longer to create. An average
Semi-Custom website may take anywhere from 8 to 12 weeks; while an Imagine Studio
website with advanced customization can take anywhere from 12 to 20 weeks.
IMPORTANT NOTE:
The timelines given above are projections only. The more custom work a website
requires, the longer it will take to launch. Your assigned Project Manager will keep
you updated on completion dates and target milestones for your website project.
Likewise, keeping in constant communication with your Project Manager is key to
seamless and efficient website completion.
Our support team will be glad to assist you Monday to Friday from 6:00 AM to 6:00 PM (Pacific Standard Time).
Need help outside of these hours? Send a message to [email protected]. We have a team of specialists who can provide urgent assistance as needed.
Call Our Support Hotline:
1.877.317.4111
Email Our Support Team:
[email protected]
Send In A Support Ticket:
Visit Our Customer Support Page
Our digital marketing services are designed to help you generate leads through both organic and paid methods.
ORGANIC LEAD GENERATION
These strategies are inbound marketing strategies that attract web traffic and
leads through non-paid advertising methods. These include:
- Search Engine Optimization (SEO)
- Social Media Marketing
- Blog Content
- True Content
PAID LEAD GENERATION
In contrast, paid lead generation uses outbound strategies to get your real
estate services in front of ideal customers. Our team creates digital ads and
targets them toward high-intent prospects to drive leads to your website.
- Pay-Per-Click (PPC) Ads
- Sponsored Social Media Posts
24/7 Customer Support We’re always ready to assist you. Get in touch to receive expert support and advice.
Contact Support